Undertaking an exterior makeover is no small feat. It’s even more daunting knowing that the exterior of your home is the first thing visitors see.
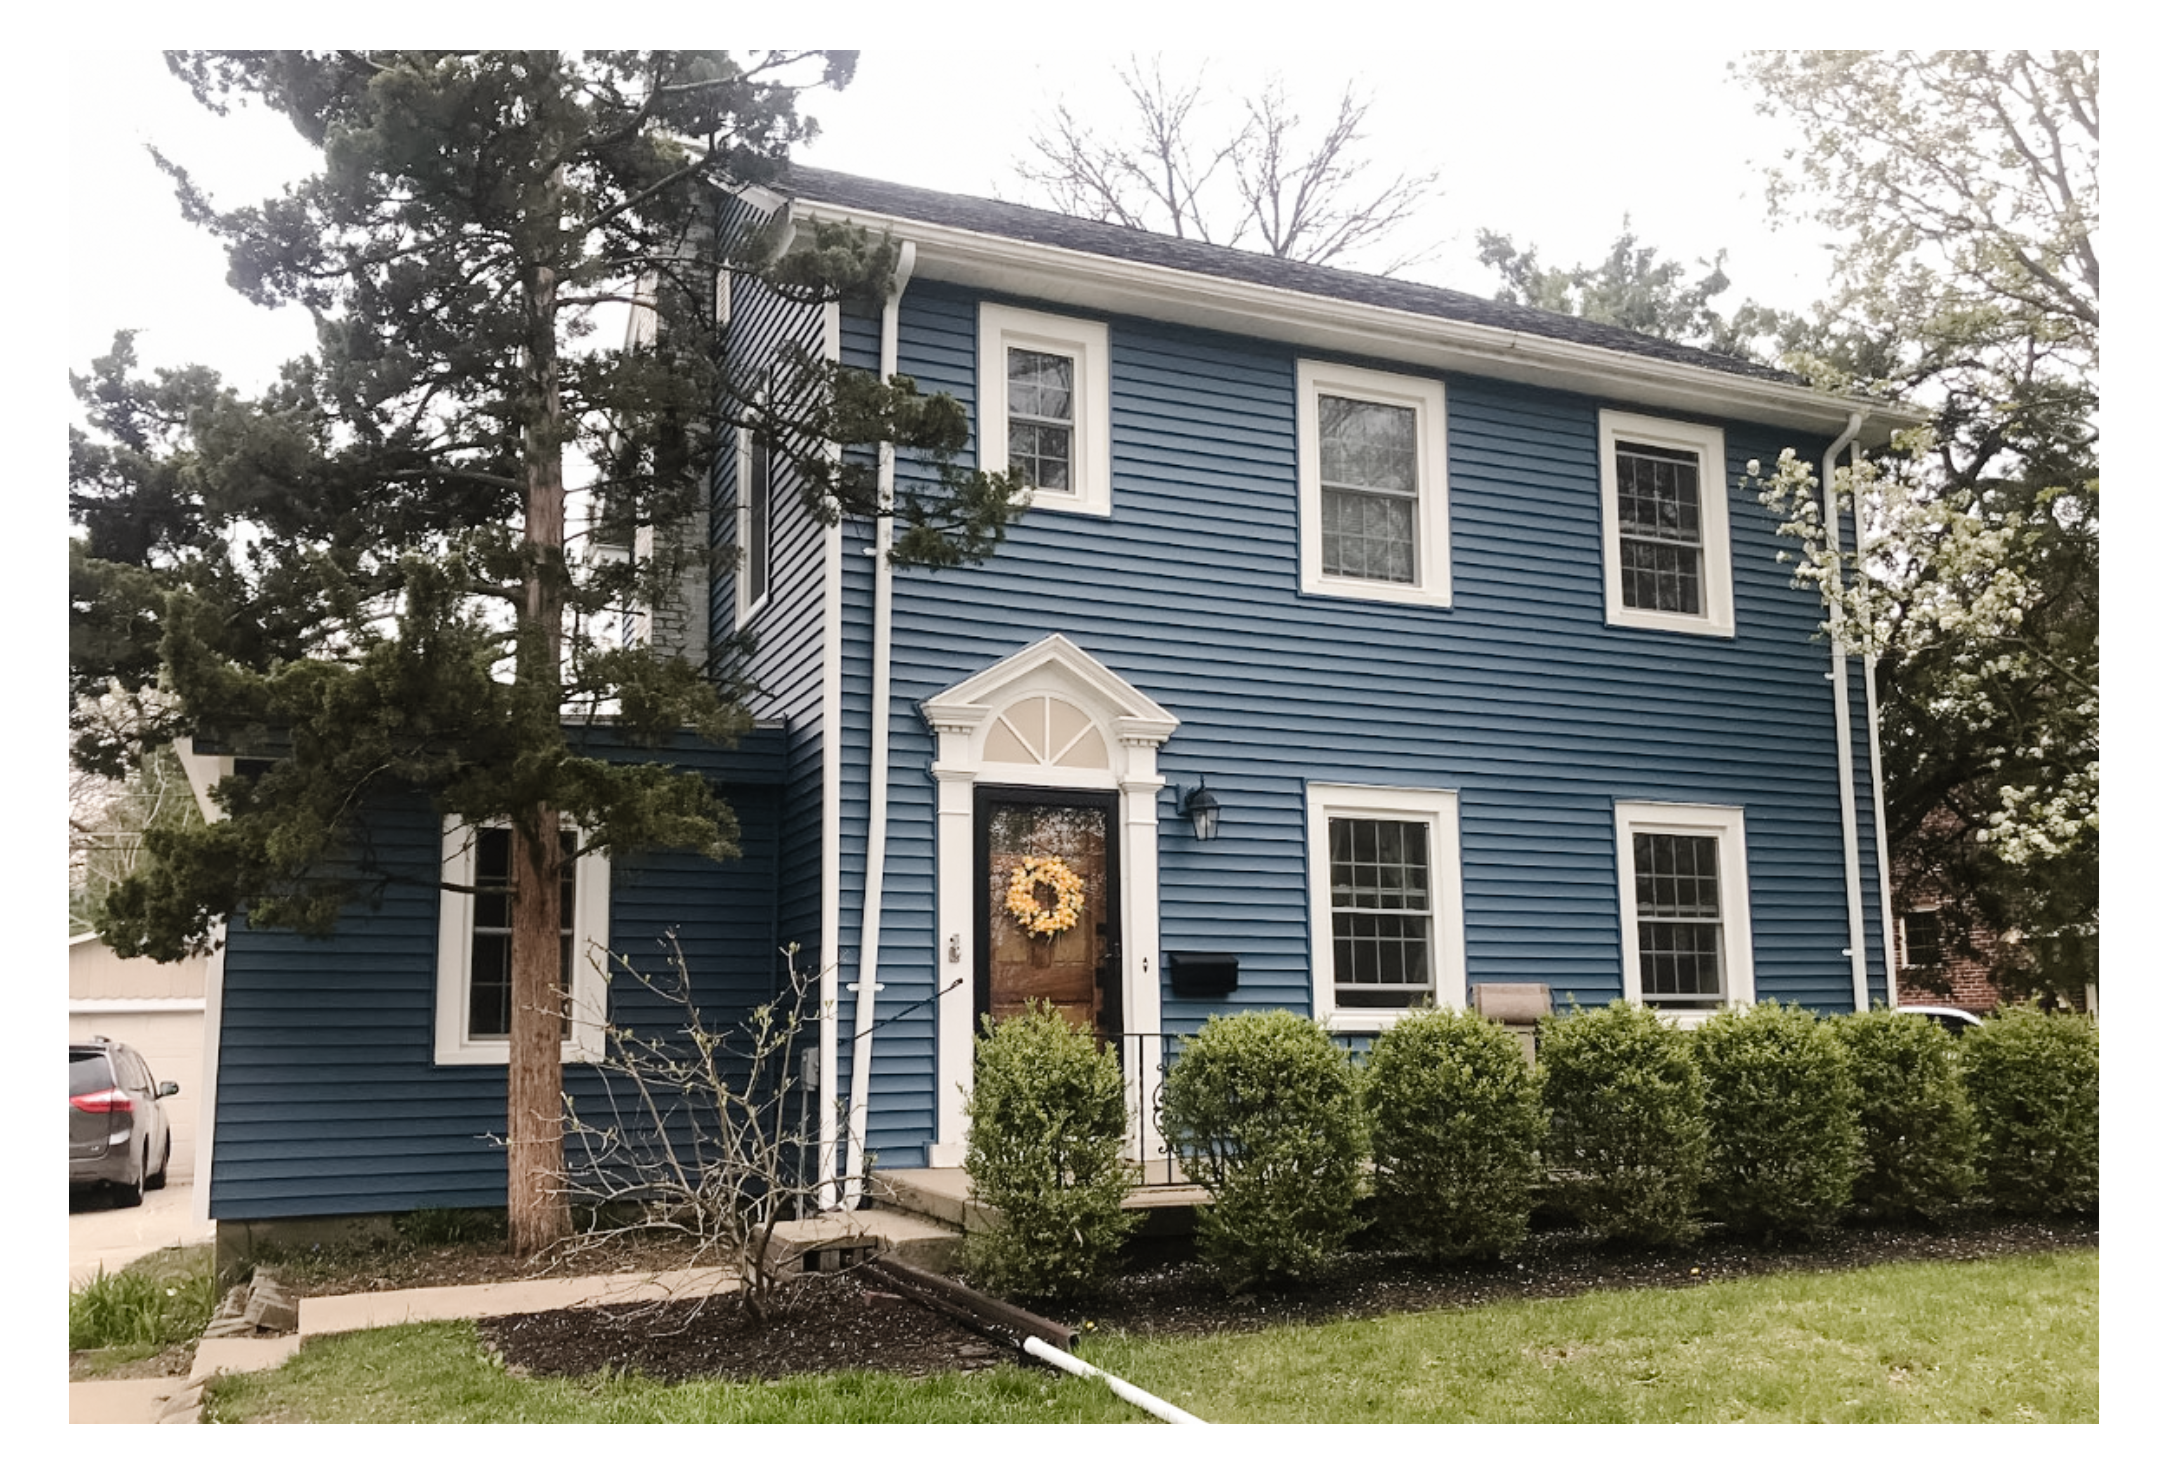
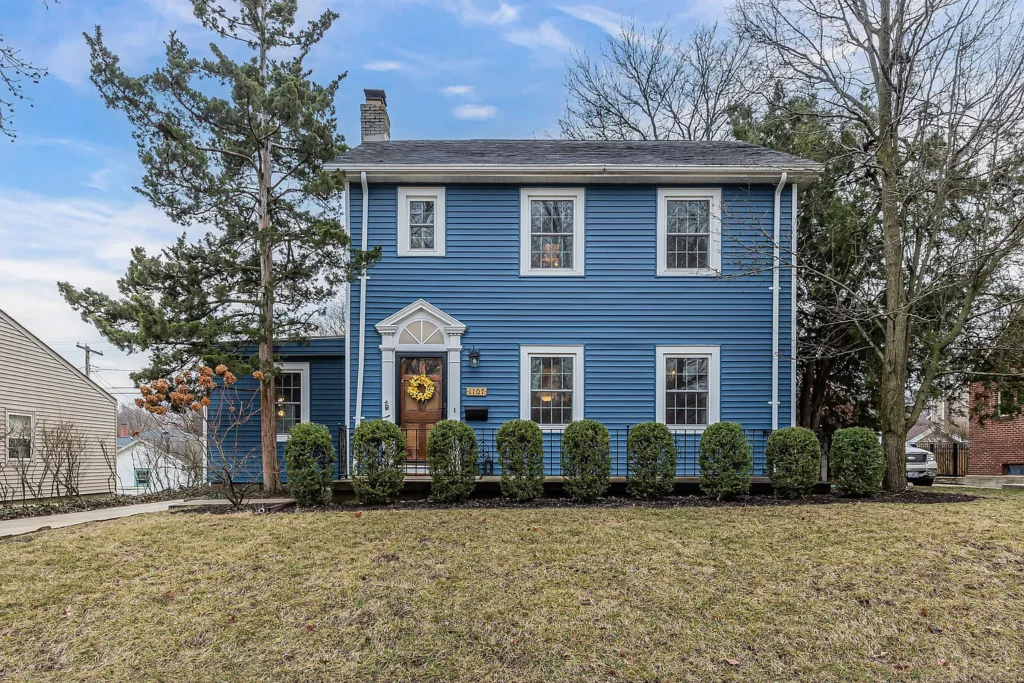
A friend of ours, Becca, recently went through the process of replacing her exterior windows and siding and WOW it’s a stunner! The striking and classic blue color that she chose complements the traditional and historic style of the house perfectly.
We asked her if she’d be willing to share more about this project with us, and she was kind enough to let us in on the details on the color she chose, materials used, and cost.
While the cost of exterior siding renovation can vary depending on factors such as the size of the house, location and the materials, this type of project is usually a worthwhile investment. In Becca’s case, it not only enhanced the aesthetic appeal of her property but also improved its value (they recently sold this home!). Read on to learn more about Becca’s exterior home renovation project!
Becca’s 1938 Classic Colonial Home
By Becca Grillot
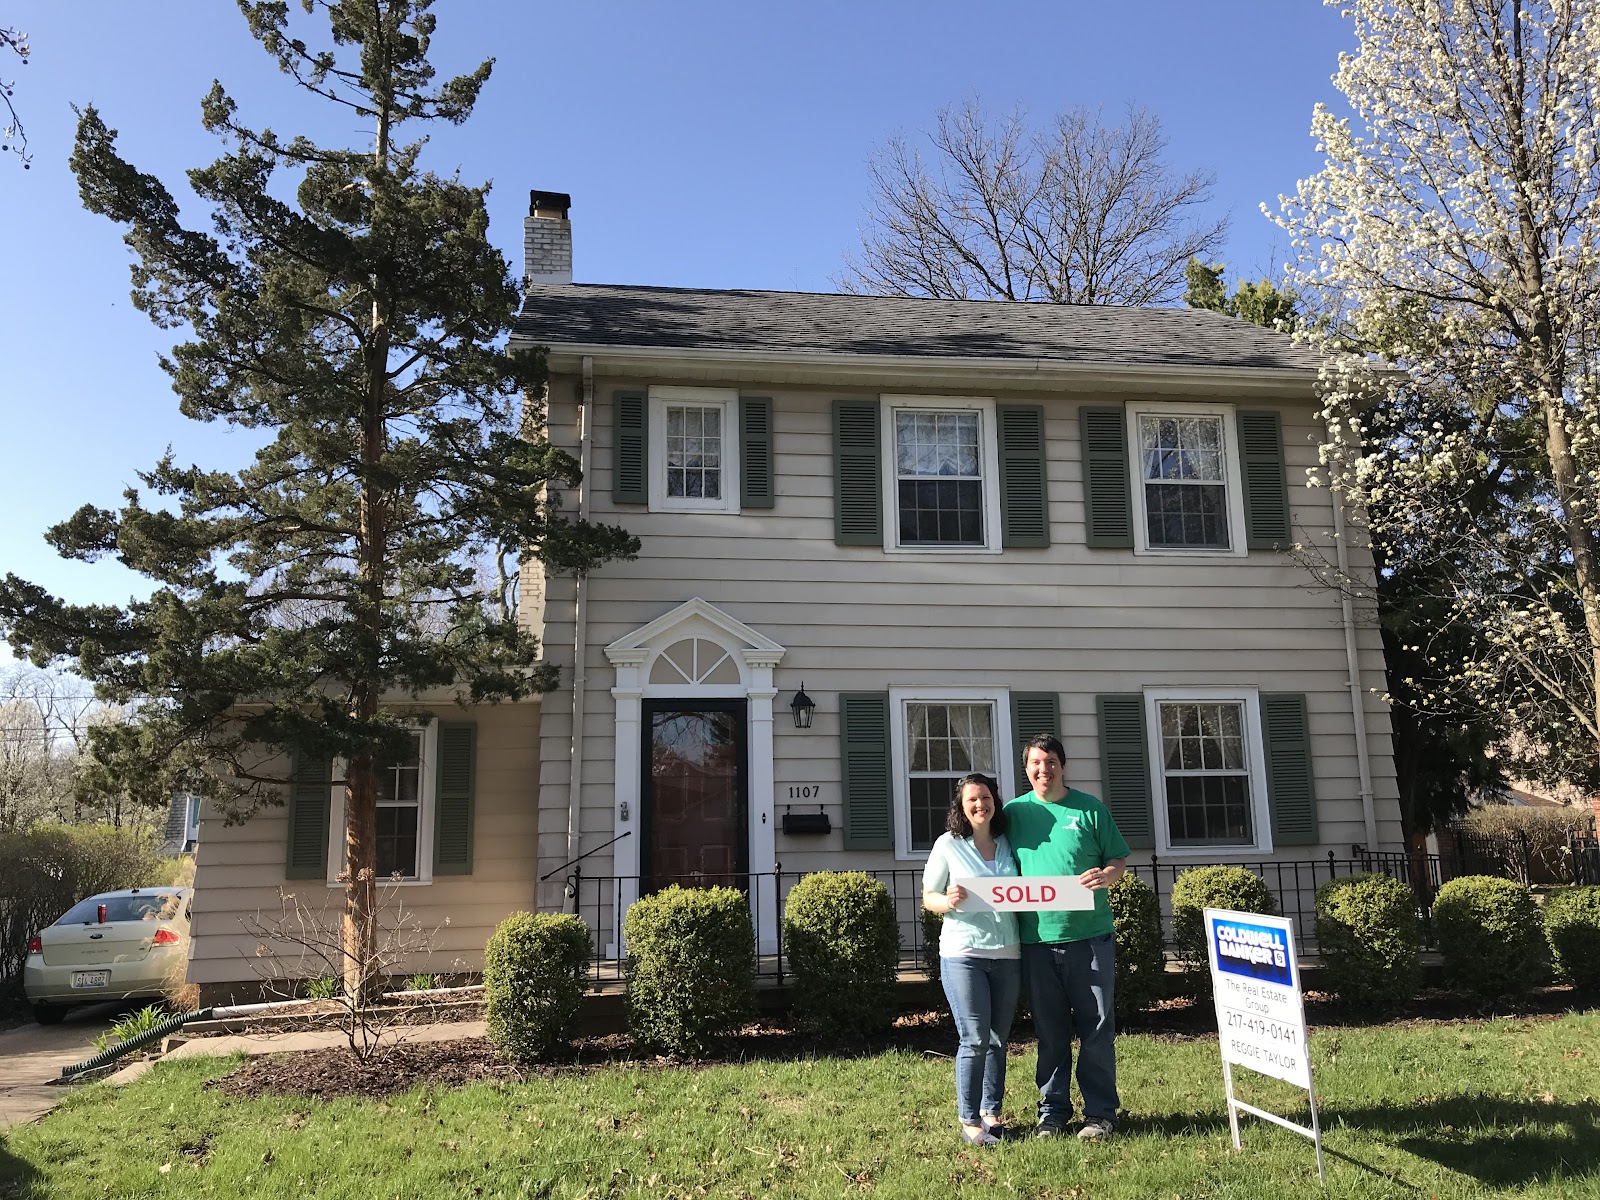
Our house in Champaign, IL was built in 1938. It’s about 1500 sq. ft, plus an unfinished basement (total 2100 sq ft). We loved the old house charm on the inside, and it’s in a really cute old neighborhood with mature trees and a park around the corner – but the exterior was faded and the windows were original.
The house also had aluminum siding, and I had been wanting to paint it for a while. I had seen several houses around town in this blue color that I loved, and I hated the faded green shutters which were starting to break anyway.
Before…
After…
First Things First
We knew the house needed new windows, so we saved up and did that project first, replacing all the windows in the entire house and removing the shutters in the process. We especially loved the bright white frames/casing on the new windows without the shutters!
A while later, we sort of accidentally discovered that our siding had hail damage when we had an insurance adjuster come out to look at something else. We filed an insurance claim (which was a whole other frustrating process) and in the end, the insurance would only cover the cost of vinyl siding, so keeping the look of the old aluminum siding was cost-prohibitive. I was disappointed because I loved the 8” exposure on the aluminum siding and thought the vinyl would make the house look too “new”.
But I ended up choosing a color I LOVE, and that’s what ended up making the biggest difference visually—not the width of the siding.
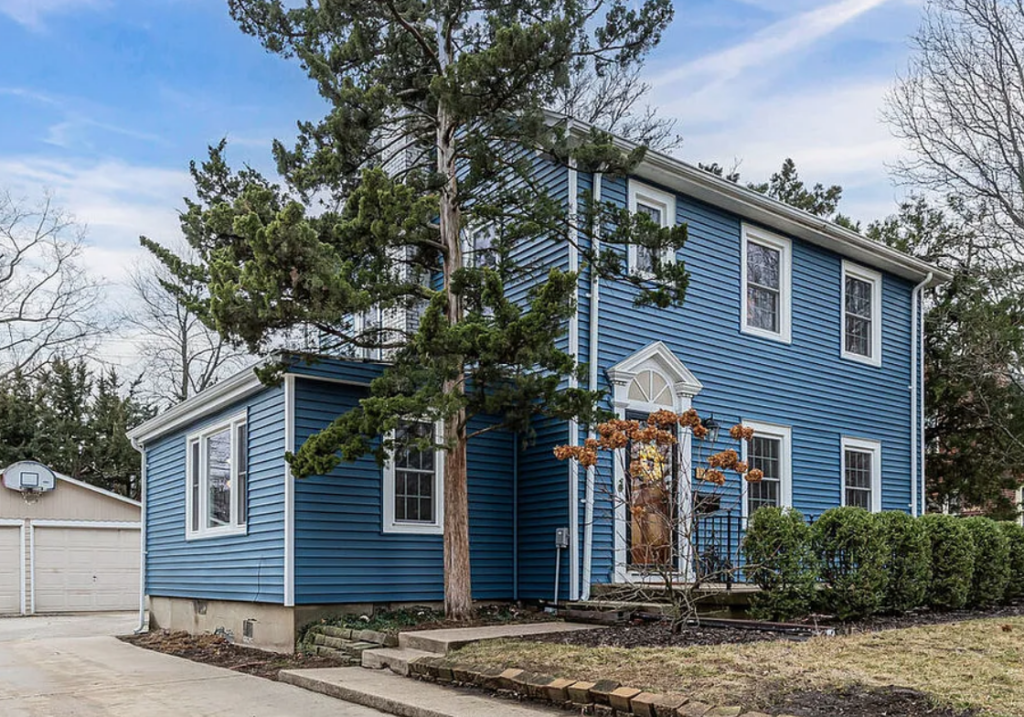
Note: Below are two real estate listing photos, so the blue color is slightly adjusted (a brighter blue) than the actual color.
Getting Quotes
We did get several quotes from different companies for the project and ended up using a small, local, family-owned construction company. They had done a promotion where they gave a great deal on gutter cleaning and donated the proceeds to charity – we hired them for that since our gutters are so high, and they did a great job. They hire a separate crew to do siding but it’s always the same crew and this crew only does work for the construction company we used.
We were very happy with their work and pleased to see that under the siding they put a whole new layer of insulation around the entire house, which definitely decreased our energy bill, even more than the new windows had. They also helped work with the insurance claim processing, so that was helpful.
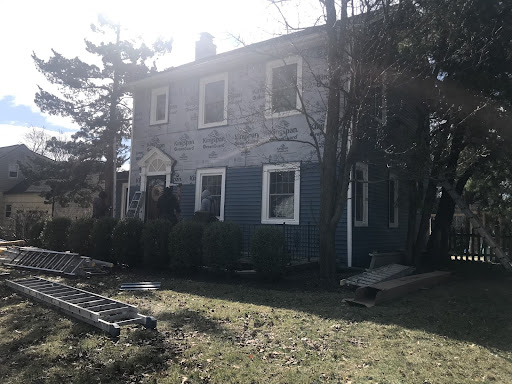
siding installation
Choosing A Color
I didn’t have a specific house or picture that inspired my color choice, but I had seen several similar ones around town that I knew I liked. We narrowed our color samples down to a few shades of blue.
We ended up choosing the color Heritage Blue by Royal Building Products.
I loved the blue/white contrast, and I didn’t want to interrupt that with shutters, so we left them off.
It was an easy decision to remove the existing shutters since they weren’t in good shape anyway and I liked the idea of a simple, clean look without shutters. We also replaced all the downspouts in white to match.
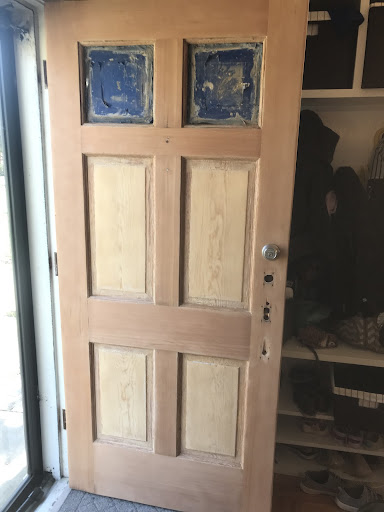
refinishing the wood door
Finishing Touches
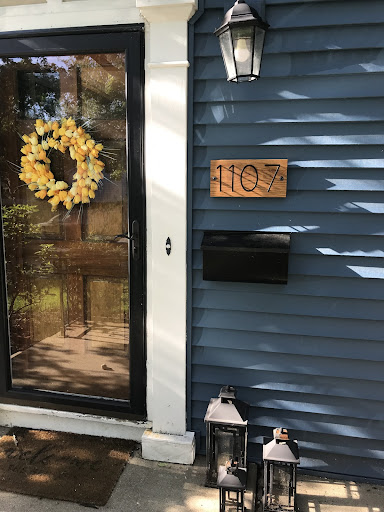
The most fun parts of this project were the finishing touches – I picked out a new mailbox, which I gave to the siding crew and they installed it instead of putting our old mailbox back on.
I also picked out new house numbers and my father-in-law built a wood plaque to hang the number on out of wood from a shelf we had replaced in one of our first apartments. We modeled the house number after a similar plaque some of our friends had made for their house number.
Then, my husband and father-in-law removed the original 1938 mahogany door, sanded it, restained it and reinstalled it. It had so many layers of white and brown paint that it took us a while to figure out what kind of wood the door was made out of.
We also replaced the old hardware on the door to update it and to solve a problem we’d been having since we moved in – sometimes when you grabbed the doorknob to leave the house, it would come off in your hand!
Cost Breakdown
When we replaced all the windows in the entire house (20 windows, and one of them is a big picture window) it ended up costing $15,000-20,000.
Thankfully, the siding was mostly covered by our insurance, but the quote for vinyl was roughly $15,000, and the quote for aluminum was more like $30,000!
Replacing the mailbox, house number and door hardware were inexpensive updates that made a big impact. I definitely recommend that for a quick and cheap way to upgrade your curb appeal!

