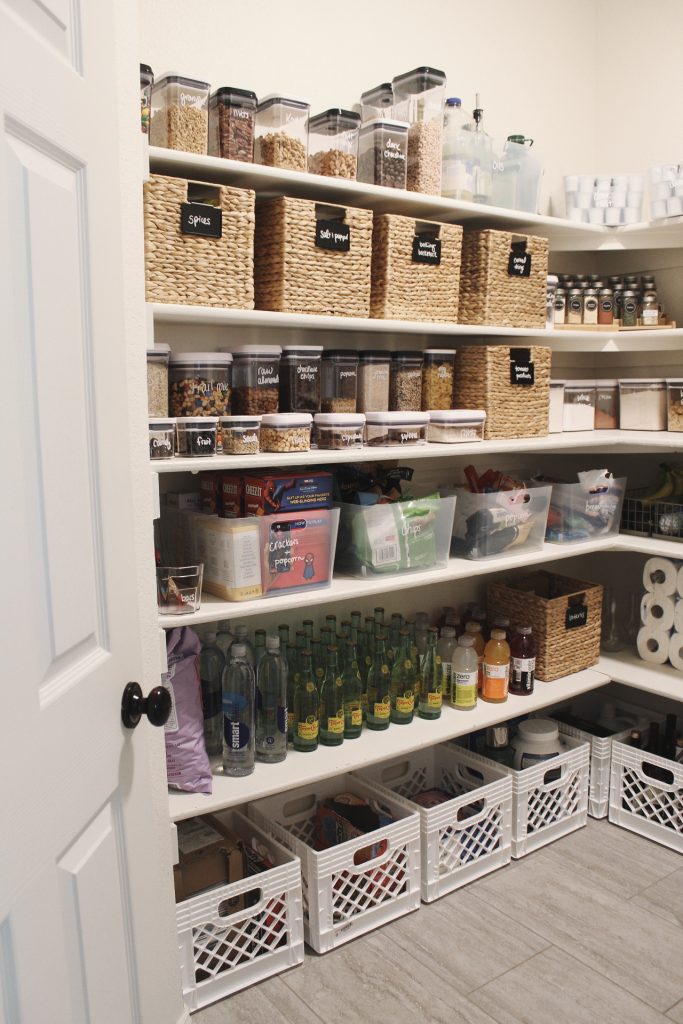
When dinner time rolls around, how often do you find yourself staring at your pantry — not even sure where to start to find something you need to make dinner?
If you’re anything like me, you’ll probably be found rummaging through an endless sea of miscellaneous salad dressings and boxes of crackers before you can maybe find the item you were looking for. A frustrating mixture of all the things we use to cook and store food, lots of things hidden and nearing (or passing) their expiration dates totally undetected.
This was our pantry situation until last month.
We recently moved, and now we have a much larger pantry than we did before. This was a big deal for us in our house hunt: we have 3 young and always ravenous triplet boys, and another baby on the way, so we were thrilled for the extra space for all the food.
But this is what it looked like.
After moving, we just dumped things in there (“oh, there’s probably room for that in the pantry”) and it grew—an untamable beast that might throw a box of brownies at your head if you weren’t careful or roll a can of tomatoes under your foot if you weren’t on high alert.
It was enough to make anyone confused, stressed, and definitely overwhelmed.
I kept telling everyone around me that I needed to organize the pantry and then one day, my husband offered to play with the boys for a few hours so I could actually do it.
Time alone, time to organize something, time to get creative? I’m not really a Type-A person but I was thrilled to put that hat on for the level of desperation we had reached.
The project
My aunt and my mother-in-law both knew that I wanted to tackle this project and had given me a bunch of those beautiful clear containers as a gift, some with pop-on lids and others with an easy-close latch. I also had 6 square baskets from decor at our old house.
Because that’s what I had, that’s what I started with. I also had The Home Edit book as general inspiration. I took everything out of the pantry that might fit in a plastic container, from flour to M&Ms to pasta. While my husband played with the boys upstairs one Sunday afternoon, it took me about 3 hours to get everything unwrapped, packaging tossed, poured into an appropriate sized container and labeled.
I tried labeling my containers with a dry erase marker, which did work, but if I accidentally touched it, it rubbed off immediately. And of course, labeling isn’t necessary for something like M&Ms, but it sure is for baking soda, so I later found a chalk marker that stayed put (but still wipes off with water and a cloth if you want to relabel later).
Plus, the chalk marker is white — my black dry erase marker didn’t show up at all against the chocolate chips for example.
Here’s what’s in my plastic containers:
- Flour, sugar, brown sugar, powdered sugar, other baking supplies
- Pasta
- Cereal/granola
- Nuts
- Candy
- Rice, quinoa, other grains (I taped the cooking instructions to the inside of the lid)
- Trail mix and a few other snacks
I had always wondered how people used these containers in their pantries, but the Internet saved me. When you’re running low on flour, you buy the new bag, but don’t pour it in yet — wait until the container is empty, then clean it out and dump in the new bag.
Maybe this is intuitive for you and you think I’m losing it. But in case anyone else was as concerned as I was about how this works, I felt the need to explain.
I also put all the spices in spice jars and labeled those, stacking them on some little spice jar bleachers in the corner. I might eventually switch to a Lazy Susan model for more visibility but this works for now.
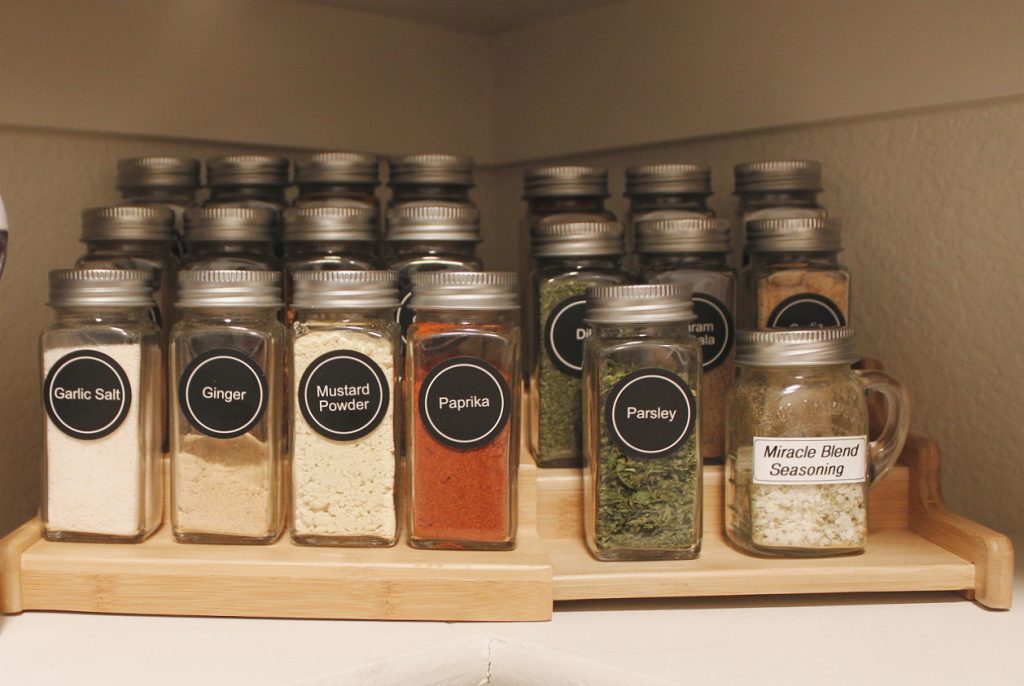
After that I called it quits for the day and we went out for dinner because there was dust of flour, chili powder and powdered sugar all over the kitchen — and we picked up some plastic containers to fill the lower shelves.
The next morning I woke up before the kids and mostly finished in an hour. I took everything else out of the pantry, grouped things with similar items, and then gave each group their own bin — this part was pretty easy.
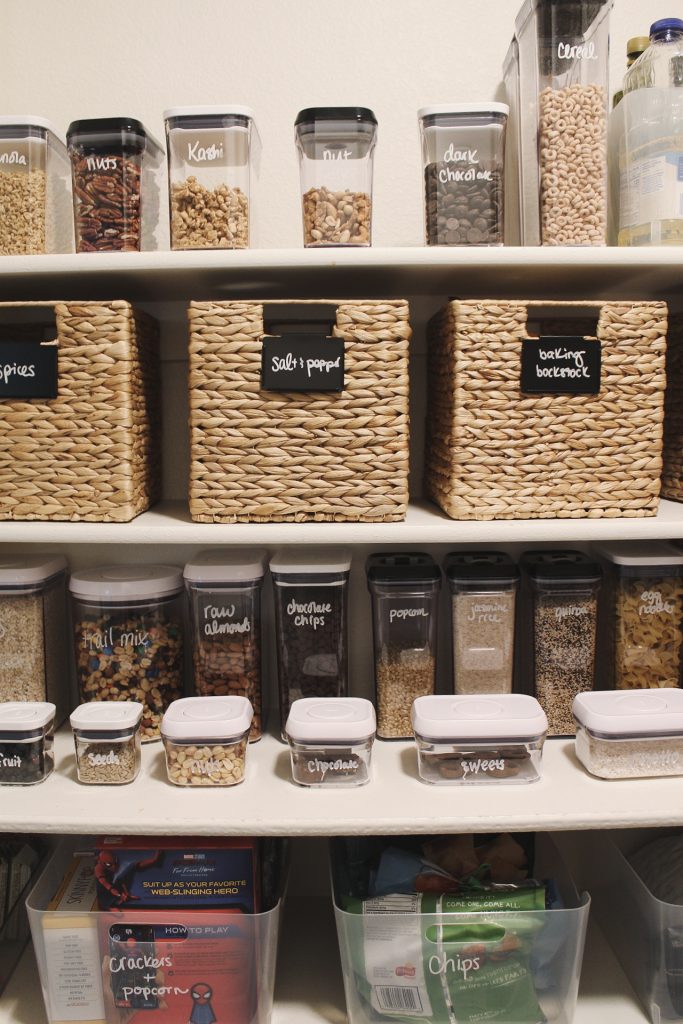
I have bins and baskets like:
- Spices (any large container of spices that didn’t fit all the contents in my little uniform jars, so spices backstock really)
- Canned things
- Tomato products
- Ethnic foods
- Kids pasta
- Chips
- Popcorn
- Miscellaneous snacks
- Paper products
- Coffee
- Kids medicine
- Adults medicine
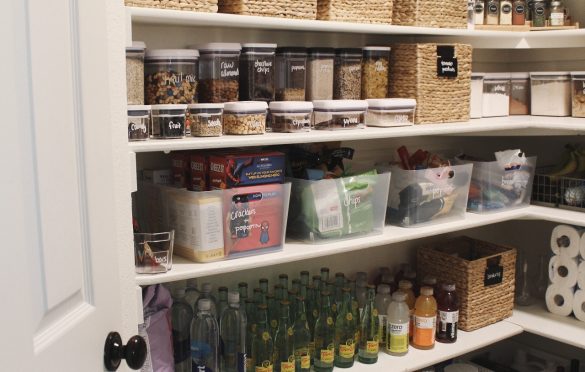
I like using the wicker baskets for things that don’t look as pretty or that we don’t access as often (miscellaneous baking backstock, for example) vs. the clear plastic bins for things we access constantly (coffee, crackers, etc).
I also removed all the water bottles, paper towels and toilet paper from their packaging and placed them out on the shelves (thank you Home Edit and Mandy Moore’s pantry for that actually very functional beauty).
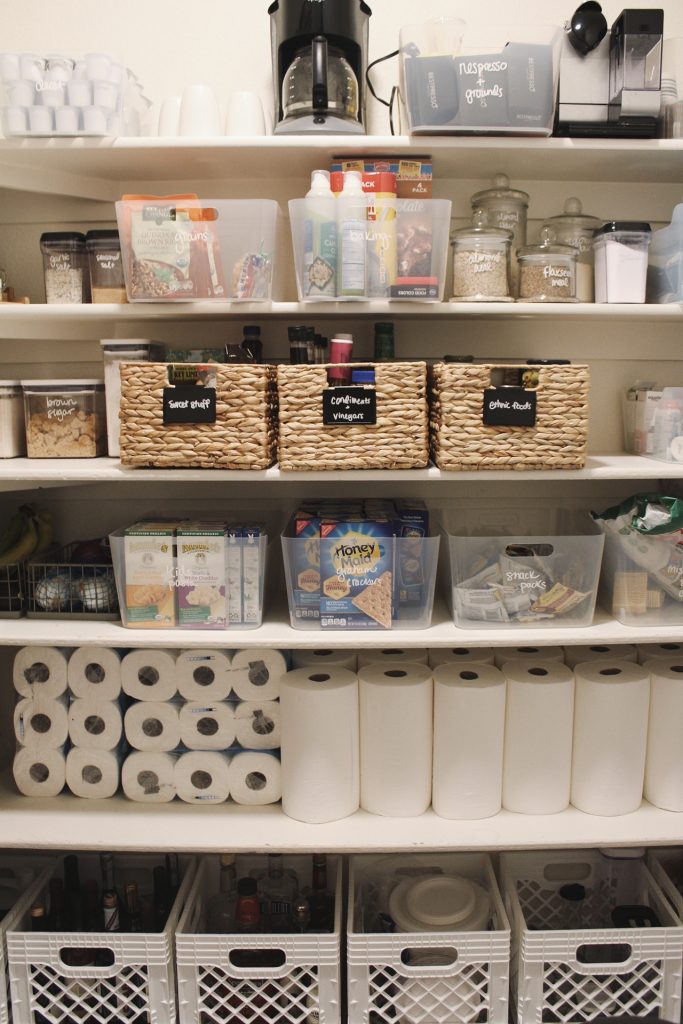
For the awkward oversized items like trash bags, pancake mix or protein powder that you don’t want to remove from the packaging but also can look really busy, I got milk crates to line the bottom of the pantry. I’m super happy with these — they were on sale, but still very affordable and VERY sturdy.
All in, including shopping time sprinkled throughout the week as I picked up more containers here and there (our Container Store has free one-day curbside pickup, a lifesaver for someone with triplets doing a very organized project in a very non-organized manner) — this project probably took 6 hours.
About 4 of those hours were really true alone-time, and 2 hours were actually just a few minutes here and there sprinkled in between toddler breakfast and toddler meltdowns.

Will I always have an entire shelf full of Topo Chico? Definitely not. I envision that shelf filling up with Gatorade and other growing boy related things that we’ll re-evaluate with time. But since I’m pregnant and the boys are still too little to open the door right now, I get to fill that shelf with whatever I want.
The bottom line
As moms, especially moms of little ones, it can be really hard to carve out time for self-care. It sounds nice, but in reality, it’s just hard to pull off — maybe nobody else can put the kids to bed, maybe you don’t have money to spend on yourself, maybe you work and you have a long commute home, limiting your time even more.
But at the same time, it’s true that you really do need to take care of yourself, because if you don’t, there is no way you’ll be able to take care of everyone else.
Surprisingly, I found that this little organizational project was exactly the self-care I needed during this phase of our lives.
It gave me time alone, time to shop and to be creative on what would fit where, time to think about something other than who pooped when and what snack is likely to go over best — and, best of all, it gave me this little room where order reigns.
Instead of walking into my pantry and feeling my panic rise as hungry kids bang on the door with increasing intensity and I can’t find anything but Thai sauce, I walk in and instantly feel a sense of calm.
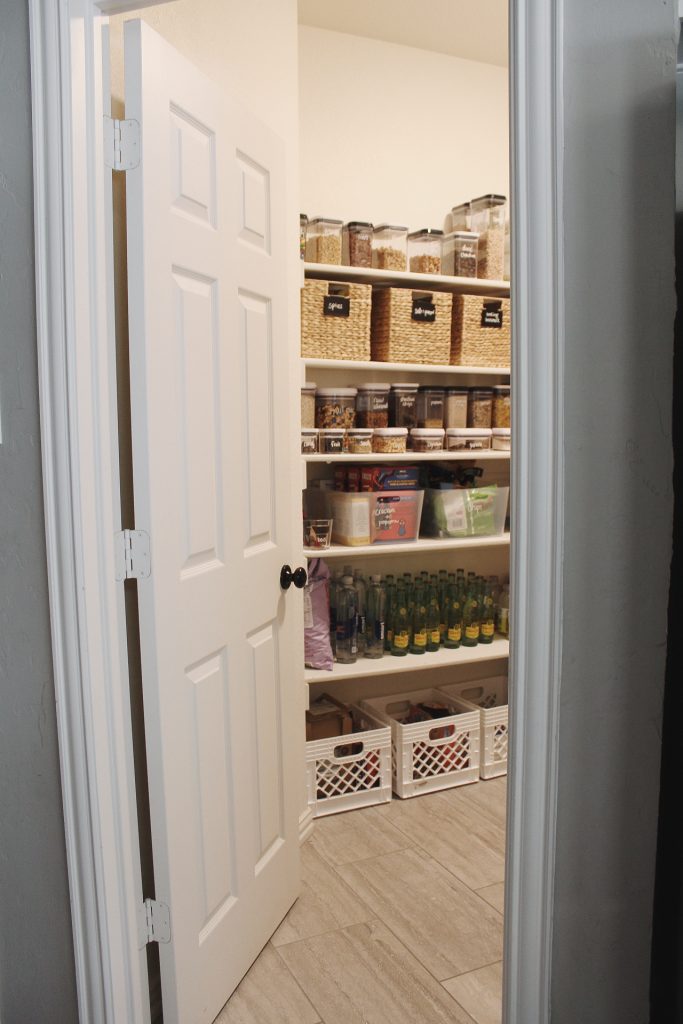
I know exactly where the snacks are and how much is left, and I know exactly where mom’s secret candy stash is and how much is left of that too. I breathe deeply when I see the paper towels in a line and appreciate how pretty that bag of pecans looks in that container while the noise increases just outside the door and I can easily grab exactly the healthy snack I was looking for before I re-emerge.
It’s functional and it gives us all peace.
Will I do this for every closet and every room? Definitely not. I think (for me at least) it would create more stress to keep every closet and every room as organized as this one (not to mention expensive to buy a whole house full of containers).
But if you’re looking for a self-care project that will last you longer than a pedicure or a Netflix binge, I’d highly recommend selecting one, extremely-often-used space and organizing it to its maximum, orderly, calming, functional potential.
That’s a self-care project that for me, keeps on caring.
Shop this post:


Thanks for the inspiration!